Swift Best Practices and Tips by Toptal Developers
Swift as a programming language was brought to the limelight in the year 2014. Swift has transformed the complex practice of programming mobile app development into an easy to write, learn and understand proposing the up to date features. Designed by Apple INC, Swift is specifically developed to facilitate iOS programming for products running on iOS platform. It is loaded with LLVM compiler that features C, C++, Objective-C and Swift code to run within one program. Swift is very friendly to program developers as it supports backgrounds, a unique which feature which allows the iOS developer to edit the script codes and generates result immediately without running the app again. Google has also announced her intention for using Swift as a first-class language for its Android app development. Here we present you some of the practices and tips followed by Toptal developers to make iOS app development easy.
A Dose of Insight: “Toptal is a community of designers and designers who are dedicated to exchanging services to companies, to each other as well as to the community as a whole. The members of Toptal are considered as the top 3 percent amongst all the designers and developers in the world.”
Before we delve into the world of Swift development, one needs to understand the defining elements as well as the differences between objects, interfaces, and model classes.
QL Tech Trivia 101:
Object: In the world of software development, an object is an entity within the coded structure of an application. It is a group or arrangement of data and functions that help in defining specific aspects of the functioning of the application.
Class: The methods along with the variables that are a part an object make up the class of the object. They can be divided on the basis of the methods and variables that are considered.
Interface: This is the part of the application in which only the declarations from the object are visible and utilized. This means that an interface essentially displays or makes use of the output born from objects and the arrangement of classes in an application.
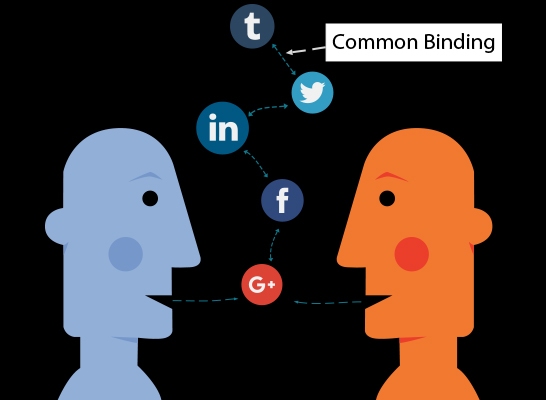
In the above image, more than one object has same common binding to accelerate the working efficiency. The reuse of the same code is a sensible idea, as introduced by Swift. For example using a verbatim code language Protocol Extensions to Bind Model classes with interfaces can be understood as under:
Let’s suppose we have a ‘User’ class:
class User {
var name = “”
var email = “”
var bio = “”
var image: UIImage? = nil
init(name: String, email: String, bio: String) {
self.name = name
self.email = email
self.bio = bio
}
}
Gradually a protocol will implement all the interfaces together that would be bind with the ‘User’ instances calling it ‘UserBindable’.
protocol UserBindable: AnyObject {
var user: User? { get set }
var nameLabel: UILabel! { get }
var emailLabel: UILabel! { get }
var bioLabel: UILabel! { get }
var imageView: UIImageView! { get }
}
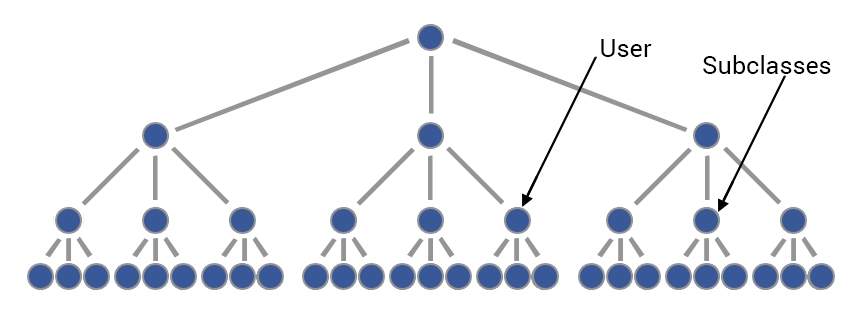
Here ‘User’ as an individual variable is a user (operator) to bind and all other ‘UIView’ the subclasses use to bind the user. The image below will clarify the above code understanding:
Now, let’s we create a protocol extension:
extension UserBindable {
// Make the views optionals
var nameLabel: UILabel! {
return nil
}
var emailLabel: UILabel! {
return nil
}
var bioLabel: UILabel! {
return nil
}
var imageView: UIImageView! {
return nil
}
// Bind
func bind(user: User) {
self.user = user
bind()
}
func bind() {
guard let user = self.user else {
return
}
if let nameLabel = self.nameLabel {
nameLabel.text = user.name
}
if let bioLabel = self.bioLabel {
bioLabel.text = user.bio
}
if let emailLabel = self.emailLabel {
emailLabel.text = user.email
}
if let imageView = self.imageView {
imageView.image = user.image
}
}
}
Here the extension is divided into two parts:

- Default Value created that allows some exclusion and some inclusion.
- All the values of user properties and fix to view.
Presenting a user list, create a ‘UITableViewCell’.
class UserTableViewCell: UITableViewCell, UserBindable {
var user: User?
// we can set the labels in interface builder or with by code.
@IBOutlet weak var nameLabel: UILabel!
@IBOutlet weak var emailLabel: UILabel!
}
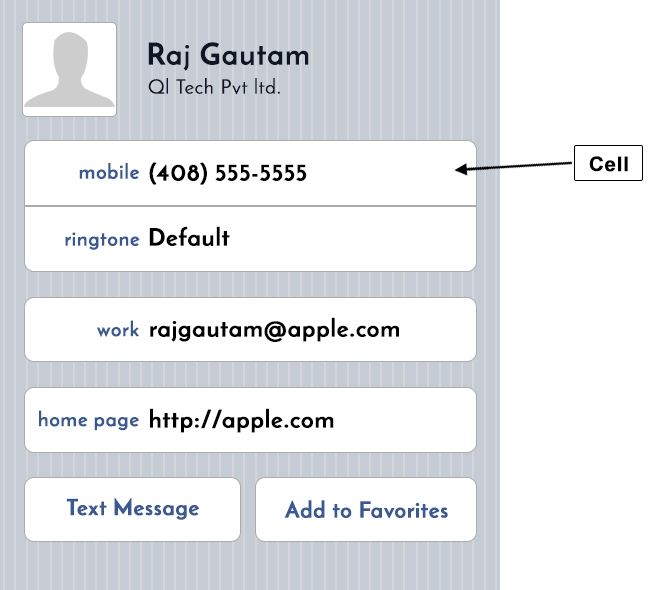
The above image indicates that the cell is binding the user through the use of the UserBindable protocol. This binds its interface to the user object.
In the UITableViewDataSource protocol, we can see the following object classes:
func tableView(tableView: UITableView, cellForRowAtIndexPath indexPath: NSIndexPath) -> UITableViewCell {
let cell = tableView.dequeueReusableCellWithIdentifier(“Cell”) as! UserTableViewCell
let user = // find the user from your array or whatever
cell.bind(user)
return cell
}
If we want to show the detail of this user after touching it, we can have a view controller like this:
class UserDetailViewController: UIViewController, UserBindable {
var user: User?
@IBOutlet weak var nameLabel: UILabel!
@IBOutlet weak var emailLabel: UILabel!
@IBOutlet weak var bioLabel: UILabel!
@IBOutlet weak var imageView: UIImageView!
override func viewDidLoad() {
super.viewDidLoad()
// here we suppose that we have set the user value before the viewDidLoad
bind()
}
}
Thus, the above example codes shown the efficient use and output of reused binding code in android mobile app development.
Use `NSDateFormatter` efficiently
Creating NSDateFormatter is a tedious job for any android programmer. But one thing that is to be notified here is that all the formatters to be used in the app are static constant. They can be reused and no need to create them again and again. The image below is an example of showing static constant:
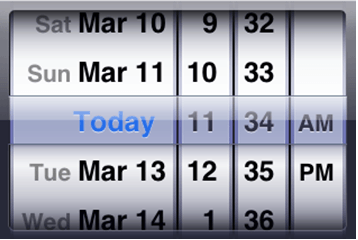
Here in the above image the day changes but the formatters remain constant. Like the name of days, 12-hour format, the name of months and numbers from 0-9.
The example of the code is as follows:
extension NSDateFormatter {
@nonobjc static let shortDateAndTime: NSDateFormatter = {
let formatter = NSDateFormatter()
formatter.dateStyle = .ShortStyle
formatter.timeStyle = .ShortStyle
return formatter
}()
@nonobjc static let dayMonthAndYear: NSDateFormatter = {
let formatter = NSDateFormatter()
formatter.dateFormat = “MM/dd/yyyy”
return formatter
}()
@nonobjc static let monthAndYear: NSDateFormatter = {
let formatter = NSDateFormatter()
formatter.setLocalizedDateFormatFromTemplate(“MMMyyyy”)
return formatter
}()
}
Now in the above code, we can make out @nonobjc attribute. This means that the value is supposed to be added in the cell. A complaint of ‘A declaration cannot be both ‘final’ and ‘dynamic’.‘ is seen. If the formatter has applied for “DD/MM/YYYY” format, then the date should be “01/01/2000”. No object can be added (“001”) nor can be deducted (“1”). Similarly, notice that adding the @objc will make your extension incompatible with Objective-C.
Next, let’s we create an NSDate extension to make a simple API convert to strings and back:
extension NSDate {
/// Prints a string representation for the date with the given formatter
func string(with format: NSDateFormatter) -> String {
return format.stringFromDate(self)
}
/// Creates an `NSDate` from the given string and formatter. Nil if the string couldn’t be parsed
convenience init?(string: String, formatter: NSDateFormatter) {
guard let date = formatter.dateFromString(string) else { return nil }
self.init(timeIntervalSince1970: date.timeIntervalSince1970)
}
}
Let’s call the NSDate extension methods.
To create a String from a NSDate:
let date = NSDate()let string = date.string(with: .shortDateAndTime)// let string = date.string(with: .dayMonthAndYear)// let string = date.string(with: .monthAndYear)
To create a NSDate from a String
let string = “06/17/2016”
let date = NSDate(string: string, formatter: .dayMonthAndYear)
By looking at the several techniques and coding customizability that Swift provides, developers can have a field day with the process of iOS application development. This article barely gives a glimpse at the gates of the opportunity that Swift throws open for developers and designers. Would you like to know more, or would you be feeling the urge to share your inputs? Let us know so that we can explore the realm beyond the gates of opportunity together.
